Recently my in-laws brought some firewood by from a cherry tree they had cut down in their yard. While unloading it I couldn’t help but notice the two burls in the pile and set them aside for a future project. As you get into any new hobby you look for ways to learn, ideally on small but meaningful projects. After making a mallet from oak scrap I decided to increase the difficulty a little and see if I could make a mallet from a cherry burl!
After hatcheting off a bunch of the bark the first step was “finding the mallet head in the log” as I put it to my friend Steve. I went over to his house to use some bandsaw time (these were too big for my little bandsaw). He was kind of enough to chase my son Ethan around the parking lot while I sawed off all the parts that weren’t the mallet head!
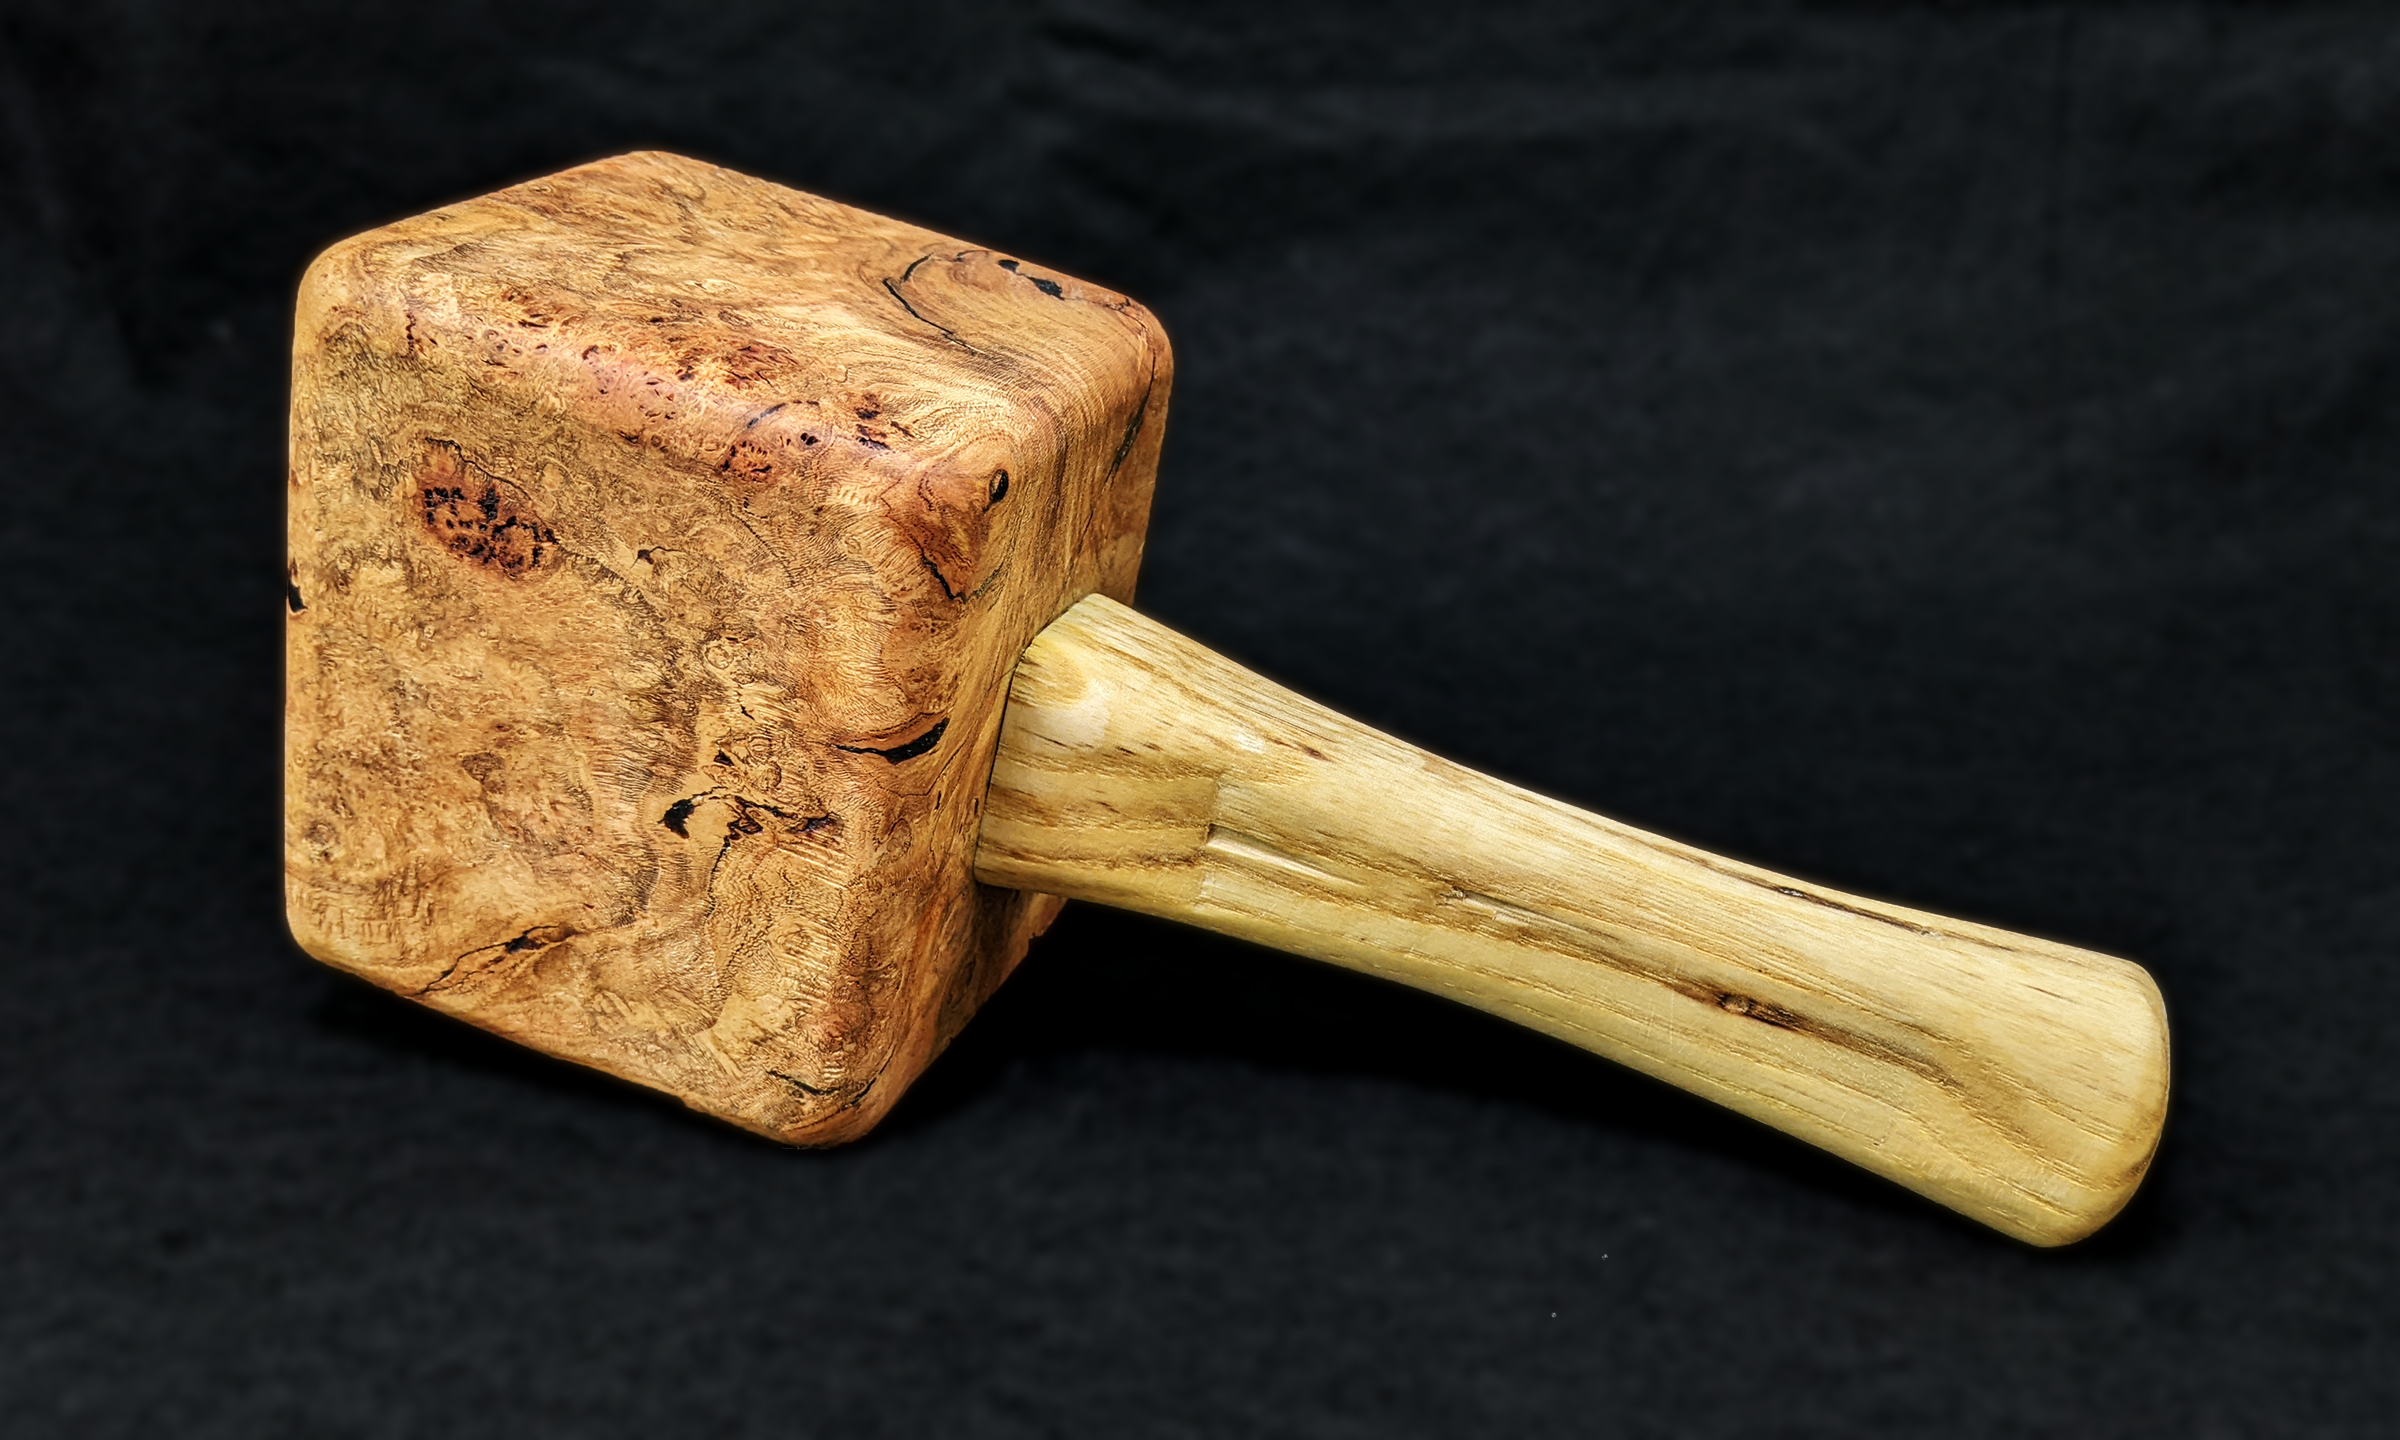
With my rough-cut part in hand I came home to further refine the size, commit to approximate dimensions, and design a handle around that. Because the piece of wood was relatively small, with finished dimensions of only 3-3/8 in long, 2-7/8 in tall, and 2-5/8in deep, I decided to make a shorter handled “detailers mallet,” as some YouTubers call them, for more precision work. This would not totally overlap the functionality of the other mallet that I had made which was nice. I also wanted to try my hand at a mortise style joint with a wedge on the one side to hold it all together.
I spent some time hand planning all the faces of my block and getting all the faces perpendicular to one another. This process was very educational. The most surprising lesson was that the block started splitting apart in the weeks following its removal from the log as a whole. The log was over a year old but I guess by removing material from the outside the piece that remained was now free to release additional stress. The wood also had small inclusions of bark and other soft spots which I removed with a pick. I purchased Stick Fast brand CA Black Flexible adhesive to fill the cracks and voids and sped up the curing process with their activator. The trick is to only apply a little, then cure it with the activator, then add more layers if needed. This worked well and I found that the CA was easy to work with the plane and later sandpaper. I filled cracks as they appeared several times throughout the month that it took me to complete this project. I’m hoping that they’re all behind me at this point!
I decided to make the handle from ash so I bought a piece from my local Woodcraft store. After a quick stop back at Steve’s to cut my block up into manageable pieces I headed home to trace out my design and start shaping the handle.
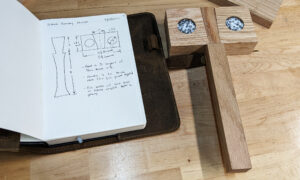
As you can see in the sketch from my notebook and the pictures of the final product the handle is relatively short and thinner in the middle than at either end. To achieve this I measured out and drew on the design. Next I made a few cuts at key locations, namely the spot where the handle enters the mallet head, and also where the tapers at each end meet the middle section of the handle, so that as I chiseled the wood would not split across these boundaries. Next I began chiseling! This was my most ambitious chiseling project to date so while I’m happy with the results there are a few permanent reminders of lessons learned on the handle.
For the record I did all the chiseling with my homemade oak mallet and my Kobalt Woodworking Chisels. They might be cheaper chisels and took some time to sharpen but they worked well and I’d recommend them to anyone looking for a good beginner chisel. I ended up buying the 1/2in, 1in, 1-1/2in, and 2in sizes.
The final step on the rough handle was to drill a relief hole and then cut down to that so I could add a wedge in later. The hole at the bottom is to keep the wood from continuing to try to split in the future once the wedge is in place. Maybe not much of a concern (it can’t split much once installed since it’s contained in the mallet head) but an easy thing to do to avoid this problem all together.
Once I had a close-to-finished handle I took measurements for the size of the rectangular hole I would need in the head. I measured and drew onto the mallet head where I needed to remove material. Marking this was made much easier with a tool I recently purchased, a precision marking T-rule. I decided to drill two 3/8in diameter holes through first before going at the block with a mallet and chisel. As you can see in the pictures the bit wandered a little causing the exit of one of the holes to be outside my drawn rectangle. This was ok though because that happened on the bottom where the handle flares out and would cover that. A concern this might happen is why I drilled in from the top surface.
Next came chiseling out the rest of the material. This took me about 2 hours because it was a bit of a learning process. I also was intentionally taking lots of effort to not remove too much material. In the end I had a handle that I could tap into the head and that took a vise or a second person to get it back out. I’d call that a pretty good fit!
The final step on the head was to round the corners. First I took a handplane to the corners to remove some of the material. But in the end I found that I needed to sand the corners to get the results I was after. I sanded through 4 different levels of abrasive (100, 150, 220, and 400 grit) to achieve my final results.
Once I had the mallet head pretty much ready to go I finished the handle. Basically this was just more smoothing, primarily with sandpaper. I worked through the same 4 abrasive levels as the head (100, 150, 220, and 400 grit) until I was happy with the results. The final step before gluing was to make the wedge that would go into the top of the handle. I found an angled wedge cutoff from the bandsaw stage and carefully cut it to the width I needed. I did a few dry test fits to see how far down it would go and marked that height and a few 1/4in marks above it so I could track how deep I was able to get the wedge in during the final assembly process.
The next step, always a little nerve wracking, was gluing! I used Titebond III for its superior strength compared to Titebond II. As one would expect I put glue pretty much anywhere two different pieces were going to touch. I had a little excess to wipe up and then I let it dry for 24 hours.
Once the glue was dry the only remaining steps were to cut off the excess from the handle/wedge gluing and then to add a finish. I cut the excess off using my flush cut saw which worked beautifully. The last step was to finish it with boiled linseed oil. I did two coats of the oil about 24 hours apart, each followed by a thorough wiping a few minutes after application. It then takes a week or two before it really feels like it has soaked in though. But the color and look is amazing!
The finished mallet weighs 14.2 oz or 402 grams and is just under 8in long. It feels great in the hand! Despite its small size I think it will pack a sufficient punch and be great for finer chisel or carving work as it comes up in the future.
Disclaimer: I participate in the Amazon Affiliate program. By purchasing items listed on Amazon using the links on this website you are supporting this website. I received no compensation for listing or using any of the products linked to on this page.

