While looking for ideas for a DIY wine rack to make as a gift (which I made!) I stumbled upon another wine rack (link here) that inspired me to make one for myself.
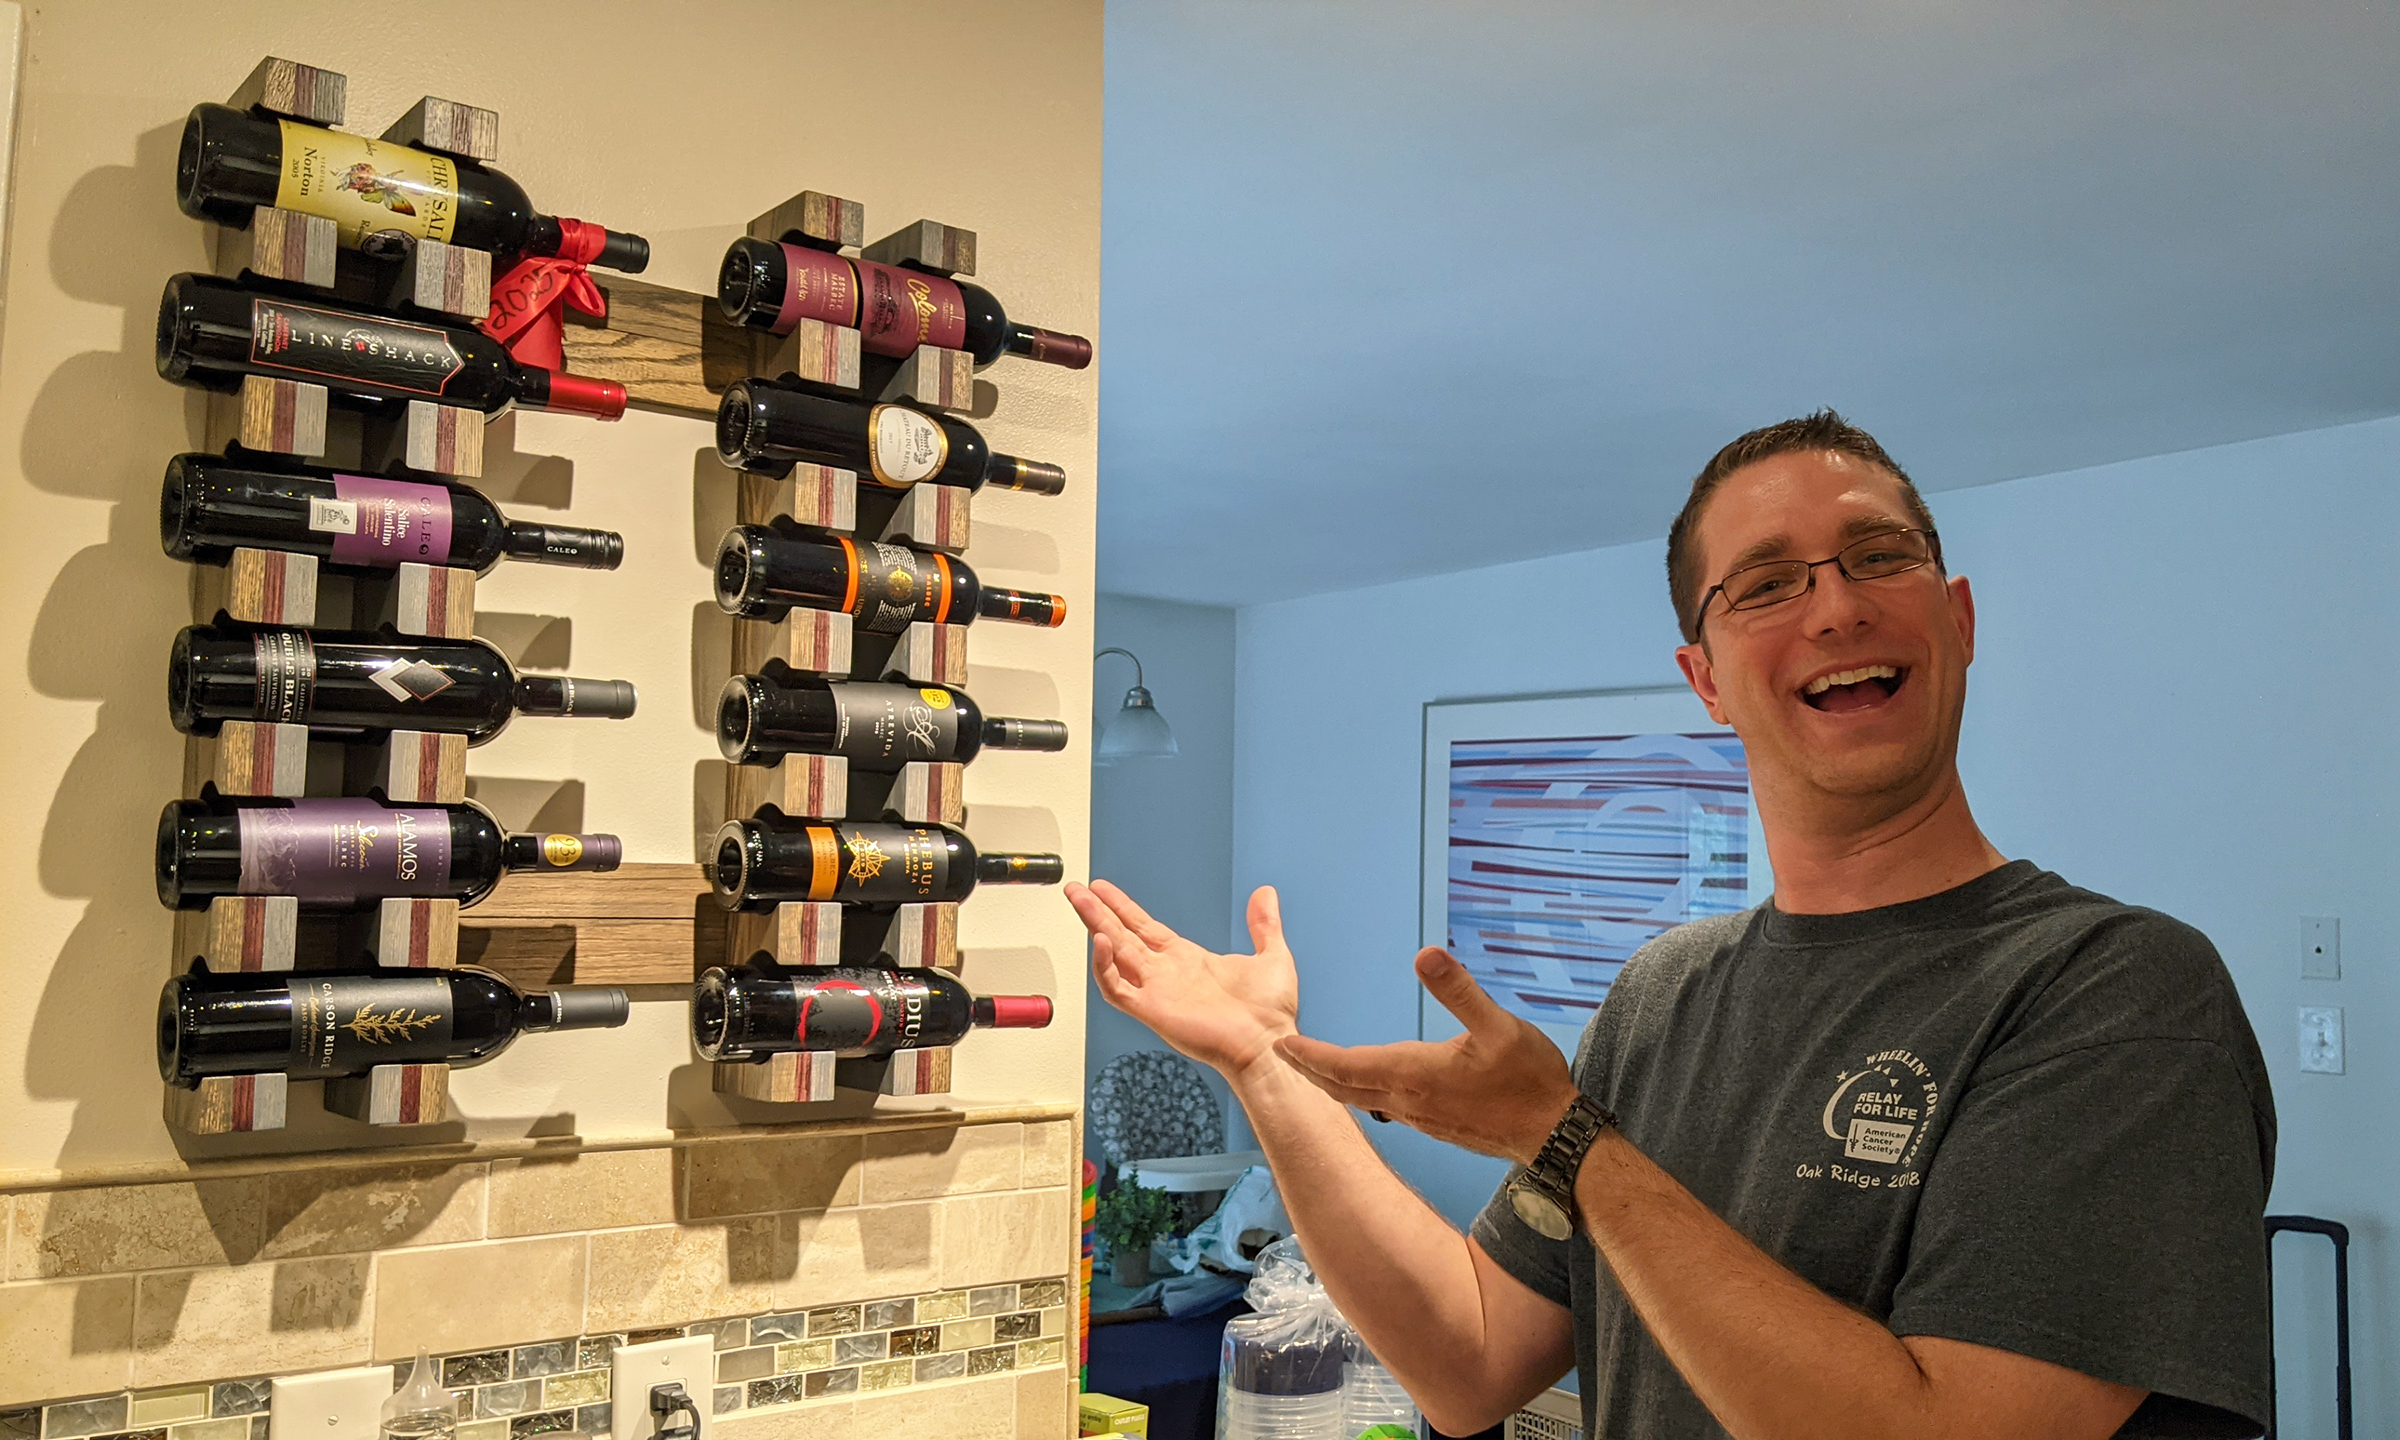
This was probably my most ambitious woodworking project to date. While it might not look that complicated I had to get the geometry just right to maximize the space available (a small wall in my kitchen) while also hiding the fasteners and general assembly method. I wanted an especially clean and modern piece. I’m pretty happy with the result though and can now store 12 bottles of wine conveniently in our kitchen.
I figured I’d document key parts of each step in-case anyone else wants to make a similar rack. Check out the albums for lots of pictures.
Key Tools and Materials:
Process:
The first and most crucial step is probably material and finish selection. I chose to use a red oak because of the texture of the grain. I then tried a few different stains and landed on the 3 listed in the materials list.
- I started with dimensional lumber, red oak, from Home Depot. The first task was to cut it to size per my design. See the drawing.
- Next you should choose how each piece will be oriented in the final assembly and then organize the vertical pieces in the final order (thick, thin, thick, thick, thin, thick…). At this point it would be wise to add the “serial letter” as shown in my drawing so you can keep track of each board throughout the build.
- Next I clamped the vertical boards into sets of 3 boards, making sure the edges all lined up, and then marked and drilled out the large holes where the wine bottles would go. I made sure to keep the boards as aligned to each other as possible throughout the process so there would be no visible step/misalignment between neighboring boards. I do recommend the hole saw I used (linked above), which did not wobble like some others I bought first.
- Once that was complete I removed the two outside vertical boards and clamped the rest together to remove the notch on the back where the French cleats would go. I did this on a mill but it could just as easily be done on a table saw with or without a dado blade.
- The next step was the most time consuming for me. If you have a router or a narrow belt sander maybe you can make this step go by faster. I spent hours hand sanding all the edges that would be exposed in the final assembly. I didn’t want them too rounded but I also didn’t want them sharp. Use your best judgement and taste here. I did most of my sanding with the 3 boards that made a vertical pack clamped together so the sanding matched and I didn’t accidentally created valleys between the boards.
- Next was staining. I grouped the boards together by the type of stain they’d receive and then marked the side or sides to remain bare with painters tape. You want to make sure to get as little stain on the sides that will later be glued as possible since the stain can stop the glue from penetrating the wood.
- Next I grouped them back together in their groups of 3 and glued them together. I used Weldbond glue, recommended by Steve Ramsey (check out his YouTube channel), because it dries clear. This was important to me because I would be applying the glue after staining and so didn’t want any excess glue to show at the joints. I clamped the boards flat against my workbench and also used a Bessey corner clamp to keep all the pieces from moving while the glue dried.
- I had forgotten to not stain the spots on the horizontal connector pieces where they would be glued so I marked them and then sanded off the stain where they would be glued to the vertical stacks.
- Now the big glue up! I made spacer blocks from scrap wood and wrapped them in paper. Then I glued all 4 vertical stacks to the two horizontal connector pieces. I used my wood stacks for spacers, the paper would allow the wood to slide out later without messing up my finish. Key step here is make sure to orient the angle on the French cleats correctly!! Measure lots as you’re locating and clamping it all together. I set big weights on the back to hold it in place.
- Next I marked and drilled out the countersunk holes in the horizontal cross pieces that would be mounted to the wall. I sized mine for #10 x 3-1/8in GRK R4 wood screws. I have a link for these in the supplies list above but you might be able to find a smaller box at your local big box store for cheaper. You only need 4 screws for this project.
- The final major step of the assembly is applying a protective finish. I used a satin polyurethane which I think worked really well. I applied 3 coats total, making sure to not get any drips or bubbles in each coat. I lightly sanded each coat after it had dried. I used sanding sponges (120 and 220 grit) to even out any rough spots (link is for generic multipack).
- A key last step on the finish was that I went over the entire polyurethaned surface (on the rack and the horizontal French cleats to be mounted to the wall) with an ultra fine sanding pad. The polyurethane had just a little more shine to it than I wanted and by lightly sanding the surface with the sanding pads it brought that sheen down just a little, right to where I wanted it!
- Now it was time for mounting. I took my time confirming, measuring, and re-measuring where I wanted the top French cleat. Take time to do this. I mounted the top French cleat (making sure it was level). Then I placed the lower French cleat on the back of the assembly and lifting the whole assembly onto the wall. Letting the rack rest on the top French cleat I then had my wife hold the lower one in place against the wall. I then removed the rack, and without moving the bottom French cleat, attached it to the wall in its current position. I did this process to ensure both French cleats would rest together with no gap.
- Now you go wine shopping and fill your new rack!!
This was a really educational project for me and I had a lot of fun doing it. I hope others find the design to be inspirational and maybe build one on their own!
Disclaimer: I participate in the Amazon Affiliate program. By purchasing items listed on Amazon using the links on this website you are supporting this website. I received no compensation for listing or using any of the products linked to on this page.
