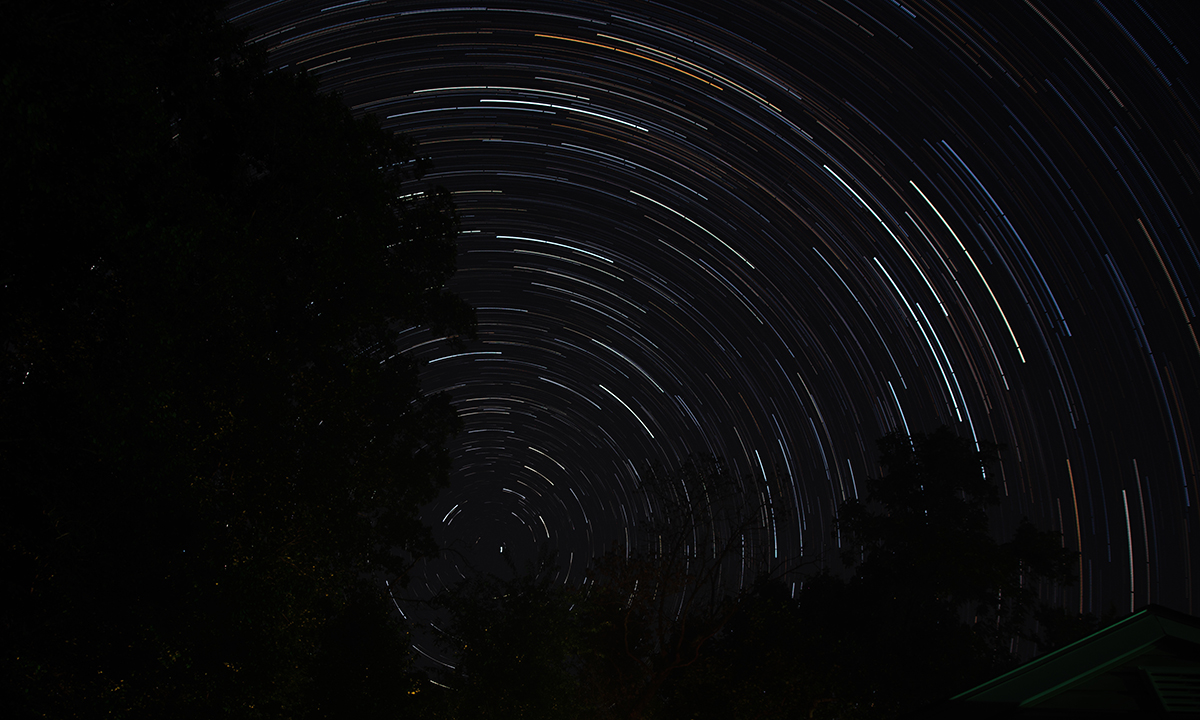
I’ve been experimenting with different aspects of astrophotography. Last night I decided to experiment with star trails. I have no delusions that this is great photography. It is just an exercise with pictures from my own backyard to allow me to play with stacking star trail software!
To be clear this is in pursuit of star stacking as opposed to just really long exposures. There are many benefits of stacking multiple images. Most interesting to me are that you can remove a few bad images without too much issue if say a plane flies through during a few shots. Also if something goes wrong with the camera you’re not left with no image after a multi-hour exposure. Instead you’re simply left with fewer images than you intended to collect. And wouldn’t it be horrible to find out your settings weren’t quite right after a multi-hour exposure?
Star stacking is the process of combining multiple individual shorter exposures into one image. By combining images taken over many minutes or hours the stars move in the images relative to one another. By stacking the movement of the stars from successive images you create the illusion that the camera shutter stayed open for one long shot while the stars moved in the field of view. I’ve looked into several different star trail stacking options and the one that seems the best for my application (on a PC and free) is StarStaX. Down the road I might pursue paid options but free is good when I’m just trying my hand at this.
Capturing the Images
I have enough light pollution to contend with as it is in my backyard so I chose a clear dark night to do this. Last night we had a third quarter moon, but it set at 1:33 pm. So I had a fairly dark night, relatively, and the evening was forecast to be clear.
One thing I didn’t do right was to let the camera get to the outdoor temperature slowly. I made the mistake of taking my camera outside from the relatively cool air conditioned house outside into the relatively muggy warm night. I had to let the camera warm up for about 30 minutes before the condensation on the lens could be removed and it didn’t reform. In the future I’ll put more effort into setting the camera in the camera bag and setting them both outside for an hour before shooting to avoid this.
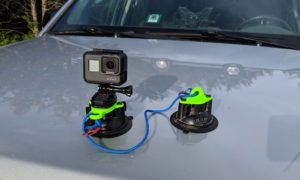
I took a bunch of shots until I got the exposure and focus I wanted. I was using the following equipment:
Camera settings during my shots were:
- Focal length 16mm (fixed)
- ISO 100
- Aperture f2.0
- 15 sec exposure
Combining the Images to form Star Trails
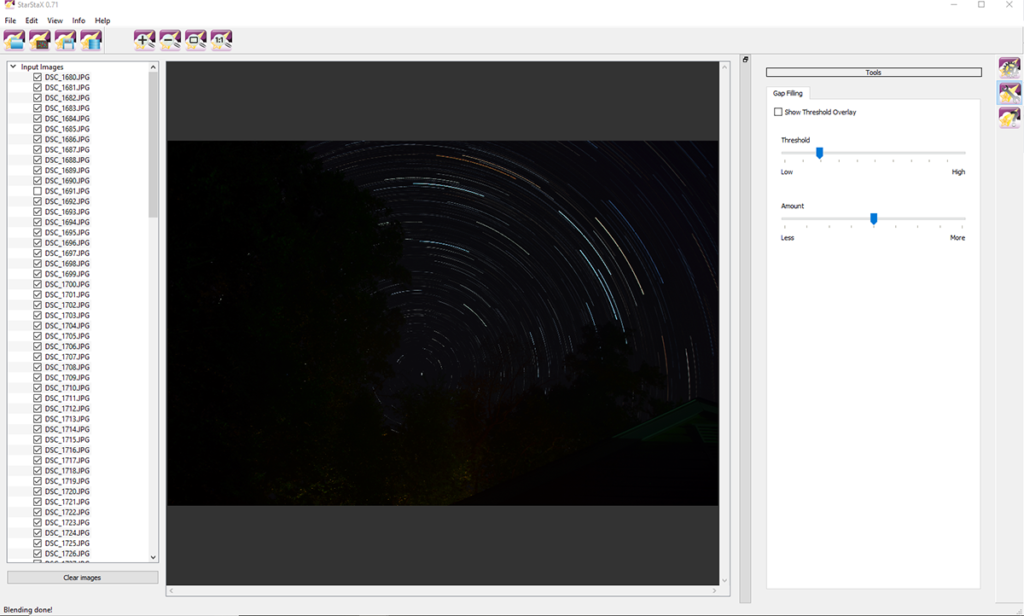
I took images every 30 seconds for nearly 90 minutes for a total of 156 images. Next I loaded all the JPEG versions of my images into StarStaX (it doesn’t handle RAWs). I reviewed the images and found two that had plane trails which I un-selected from the list so they wouldn’t be combined with the other images in StarStaX. I selected Gap Filling under the Blending tab, and unchecked everything except Save after each step which I checked. Saving each image outputs a collection of successive images which can be combined later in a video editor to make a video of the trails forming!
On my relatively old desktop this process still only took a few minutes. Once the images are stacked you’re presented with two sliders to help you adjust the gap filling applied to your image. I adjusted the sliders until the desired effect was achieved and saved the output image. I opened the image in Lightroom and did a few minor tweaks to the image before calling it complete.
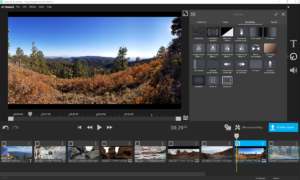
I also made a short video of the star trails using PowerDirector to combine the collection of images StarStaX produced. I I find the effect mesmerizing and a neat tool to provide an interesting backdrop to silhouettes.
The software worked remarkably well. I especially like the fact that my star trails have different colors which is the true color of the stars. This was captured because I had such a low ISO but wasn’t especially visible until the stars are represented by long streaks of light rather than a small batch of pixels. Now that I see how this works the next step is to get somewhere more picturesque than my backyard and try again!
