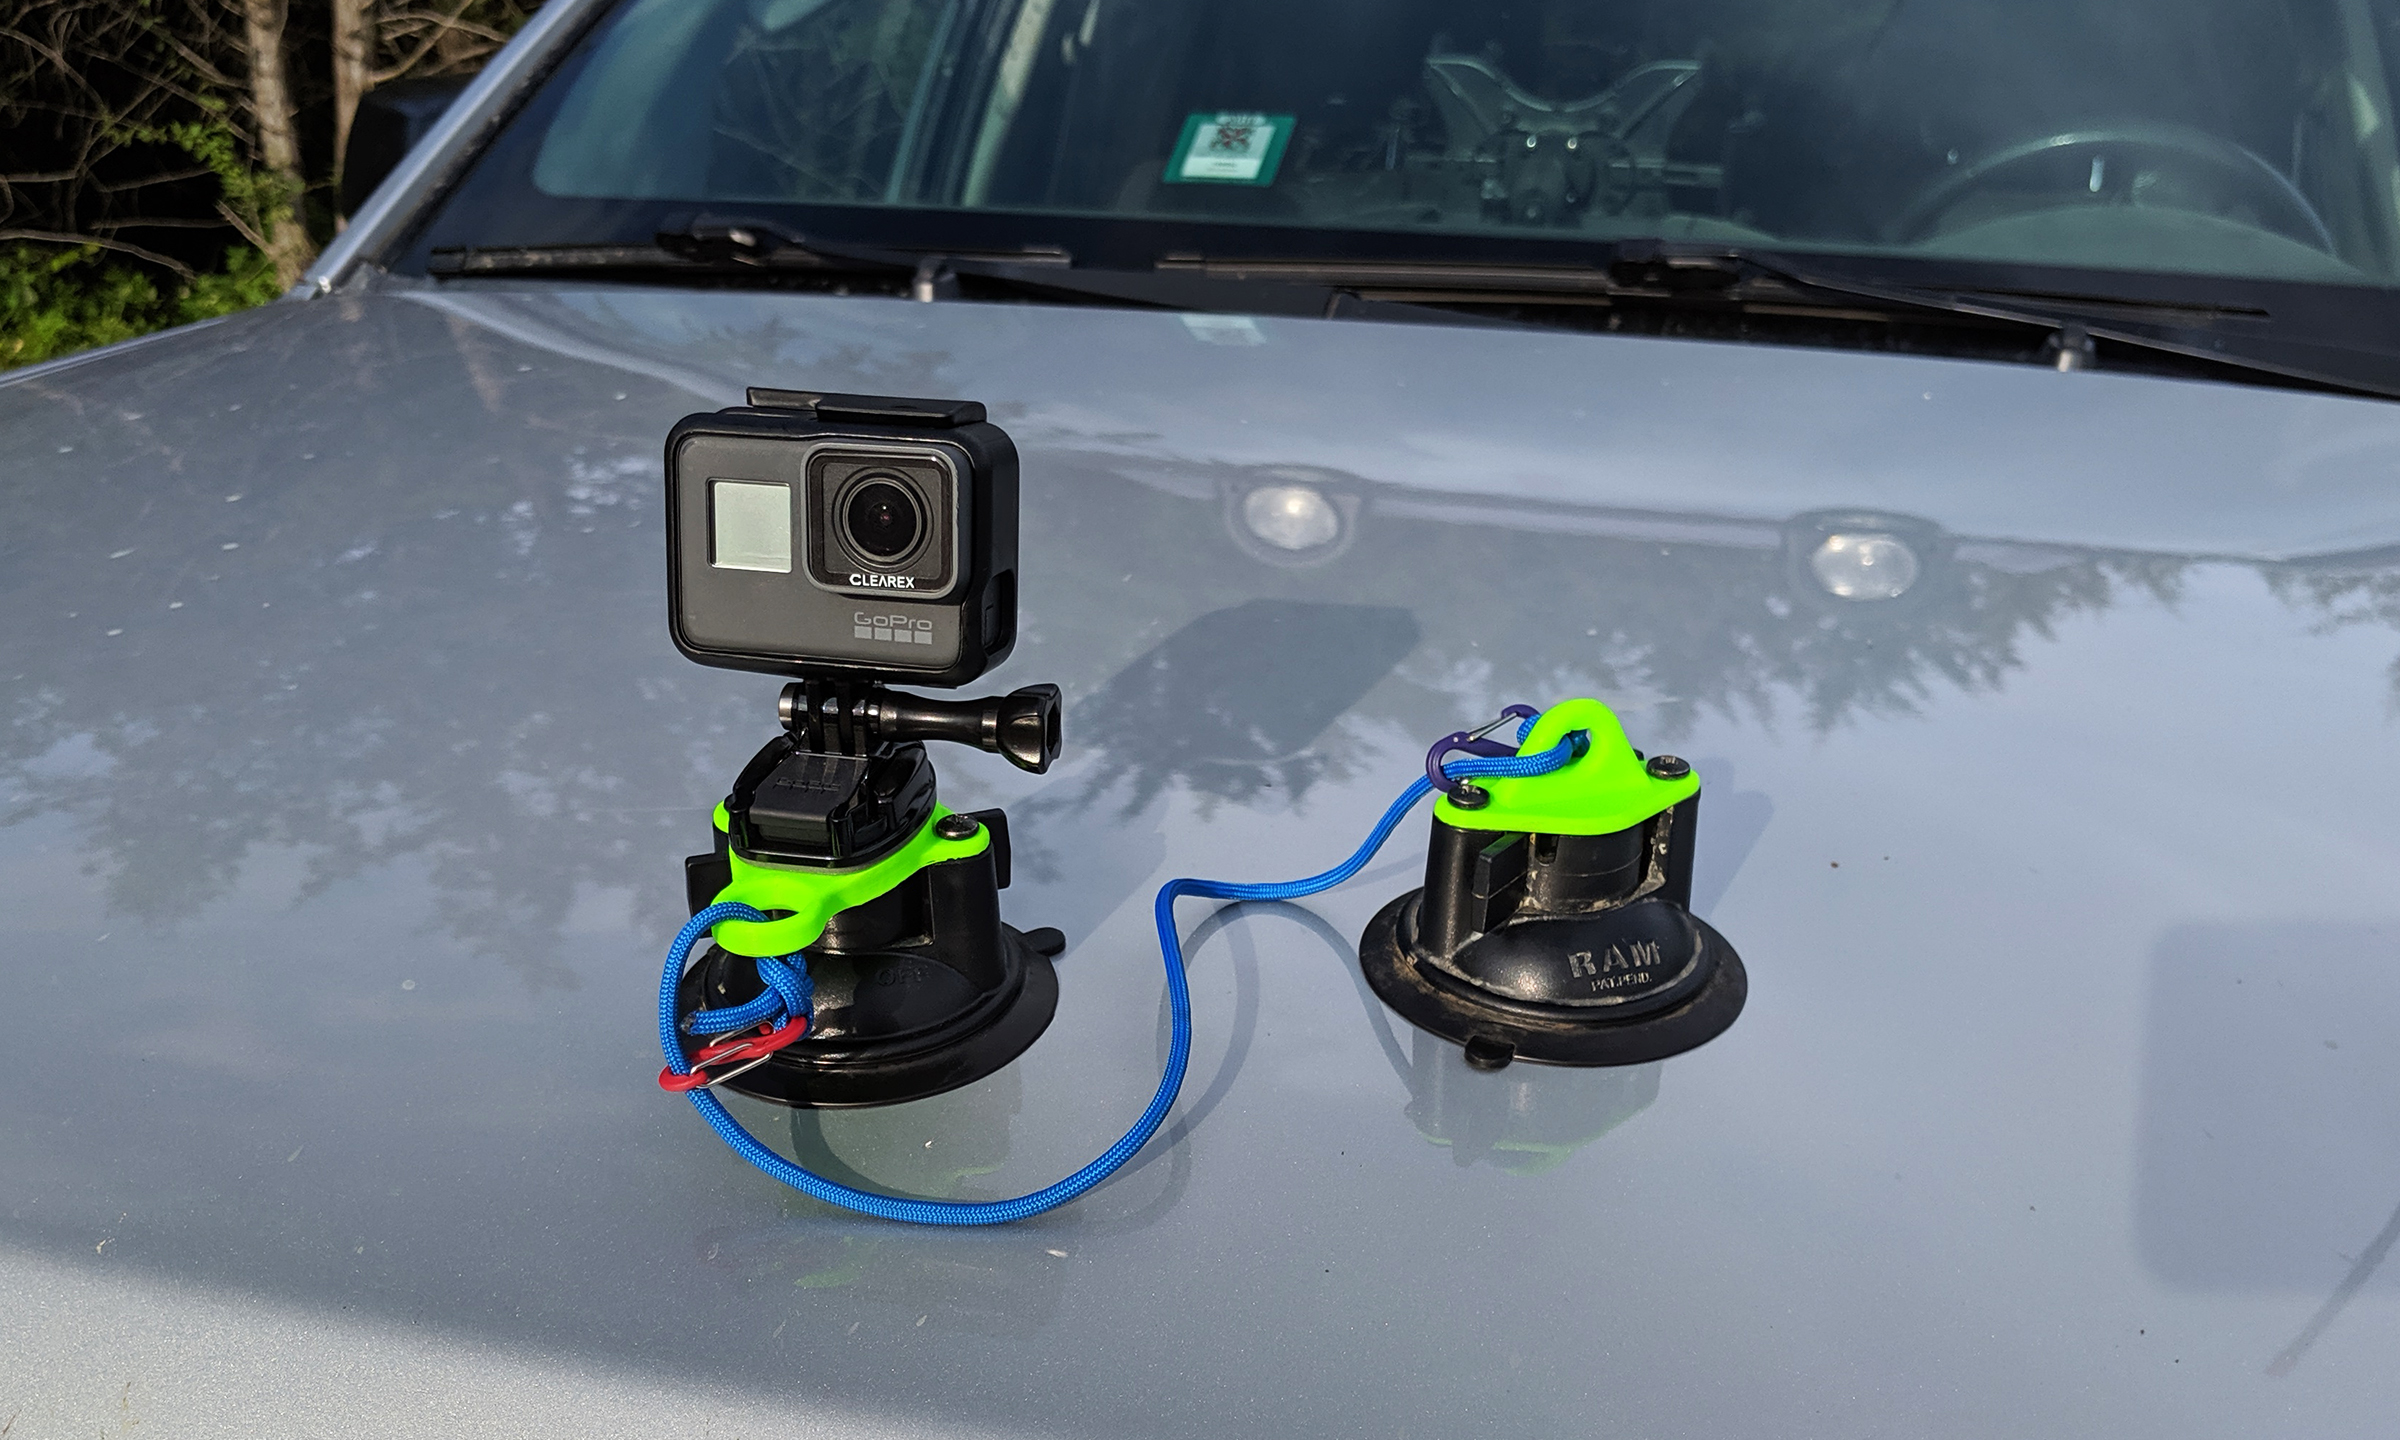
I made myself a simple GoPro camera mount that I can easily attach to smooth surfaces and remove whenever I’m done. I needed a mount like this for our off road adventures, to get those cool shots in my videos, but this mount could be used on other surfaces as well such as a boat or airplane cockpit window. In addition to the fixed mount I made a simple tether so I can keep my expensive camera from falling off my vehicle. I also pulled together some parts to make a more adjustable GoPro mount based on commercially available parts.
The base of all three of these mounts is a standard 3.3” RAM Mount suction cup (links below). I’ve used these suction cups for years for various personal and professional projects and have always been very impressed by them. If you attach them to a smooth, clean, non-deformable surface they will hold on tight. Normally you attach the ball that comes with the suction cup, but you can design your own attachment device and just install it onto the suction cup instead. I like the 3.3” suction cup much more than the 2.75” suction cup. The reasons are that the 3.3” one gives you the option of attaching other things onto it instead of a ball, and that it is much easier to mount and remove when the mount gets wet or dirty.
Below are the three parts of my “kit” that are covered in this post. The Fixed GoPro Mount, the Adjustable GoPro Mount, and my Suction Cup Tether.
Fixed GoPro Mount
This mount is fairly simple but does include one custom designed 3D printed adapter that allows the GoPro mount to be easily attached directly to the suction cup. I wanted to do this to avoid the long lever arm that would be created with a more traditional ball, socket, and ball RAM mount installation. For my off roading adventures it’s handy to have a camera that is fixed to the vehicle to give me solid shots to document the trip. The more traditional setup can result in a shaky video in many circumstances.
Below you can see my custom designed part to allow this. The part can be 3D printed without support. If you don’t have access to a 3D printer don’t fret. There are various sources online that can print things for you for low cost. Additionally your local library is a good place to look for a 3D printer. I know mine offers 3D printing for $0.05/gram of material, so this part would have cost about $2.50.
Once you have the 3D part installation is as simple as attaching it to the RAM Mount using the supplied screws, then attaching a standard GoPro Mounting Base onto the 3D Printed part.
I printed my parts in neon green to make it easier to see in this post what is printed but if you want a more subtle install just print in black. I’d suggest ABS (or UV stabilized ABS is even better) and avoid PLA if given the choice. PLA will likely meet your needs but is more likely to have issues if used outside in a wet environment like I use mine in.

Adjustable GoPro Mount
When I first made my kit RAM did not offer a GoPro mounting kit yet. They do now! If you just want to order their kit you can here (RAM-B-166-GOP1). That being said I think given the choice I’d still piece together the Adjustable GoPro Mount that I put together. The slightly longer arm that I use gives more options as far as adjustability goes regarding how far you can move the camera from the mounting surface. While I mentioned above that I sometimes want to avoid the long lever arm, sometimes I want to stick out off the vehicle to give me a better angle of what is going on. See the shot below for instance and imagine how much less exciting it would be if the camera was a little closer to the vehicle. The second reason I like my mount better is that it comes with a thumb screw for attaching the camera shell to the mount. The kit above uses a phillips screw. Obviously you can buy spare thumb screws to replace that which would be another option, but my list of parts below comes with the necessary hardware already.
This mount has no custom pieces, just RAM and other COTS parts available online pieced together to make the mount I wanted. I use this mount primarily when I want to mount my camera onto a vertical surface but want the camera to remain in a landscape orientation. Most commonly that means mounting onto the side of my vehicle.
Suction Cup Tether
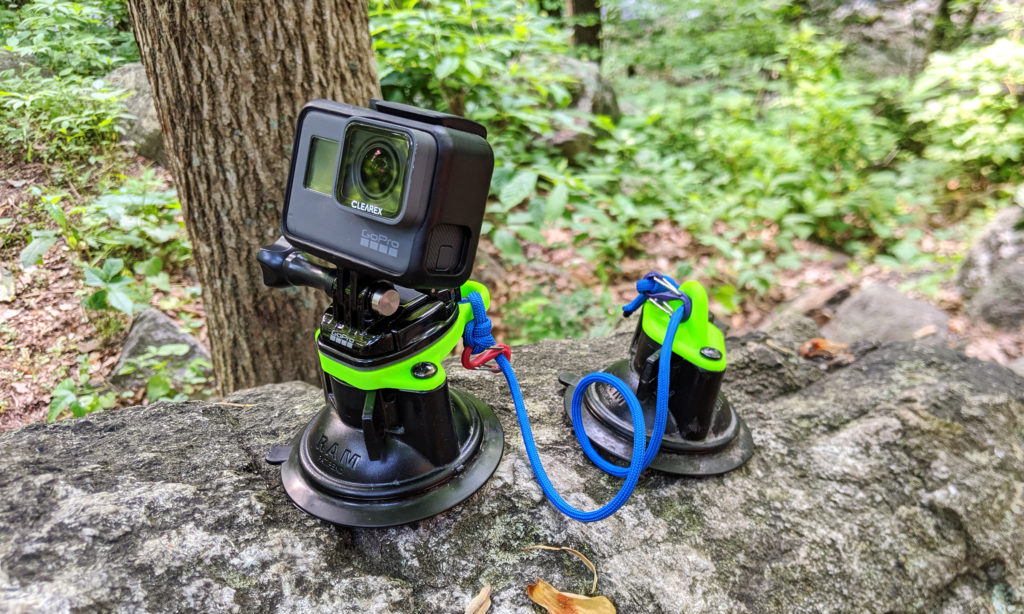
In addition to a camera mount I wanted to make sure there was a backup to hold my camera if the camera suction cup did manage to come loose somehow. If I can I’ll tether to some solid piece of the vehicle like a side view mirror, but often there is no convenient nearby place to tether too. So I made my own!
This tether is comprised of another RAM Suction Cup Mount with another custom designed and printed 3D part. The 3D printed part simply mounts onto the suction cup with the provided hardware in place of the normal ball. My main camera mounts rarely fail, but when they do it’s generally because the vehicle surface wasn’t clean or a branch knocked it off. It’s happened a few times and I’ve been happy that I had my backup tether there to catch the camera so I didn’t damage or lose it.
I used 550 Paracord for the tether with a good clove hitch knot at each end attached to #0 sized Nite Ize S-Biners. These little clips are plenty strong for the task at hand. The hole in the Fixed GoPro Mount and the Tether Mount are designed to fit one of these clips through while already attached to paracord. You can also use the clip and paracord to attach the tether to something else like around a side view mirror. Once you cut the paracord to the proper length for your application make sure to melt the ends to mitigate fraying.
Disclaimer: I participate in the Amazon Affiliate program. By purchasing items listed on Amazon using the links on this website you are supporting this website. I received no compensation for listing or using any of the products linked to on this page.