I’ve never made wire wrapped jewelry. But it turns out not to be that difficult! Learning how to make custom wire wrapped jewelry turned out to be a fun and rewarding project and a special unique gift for Christmas!
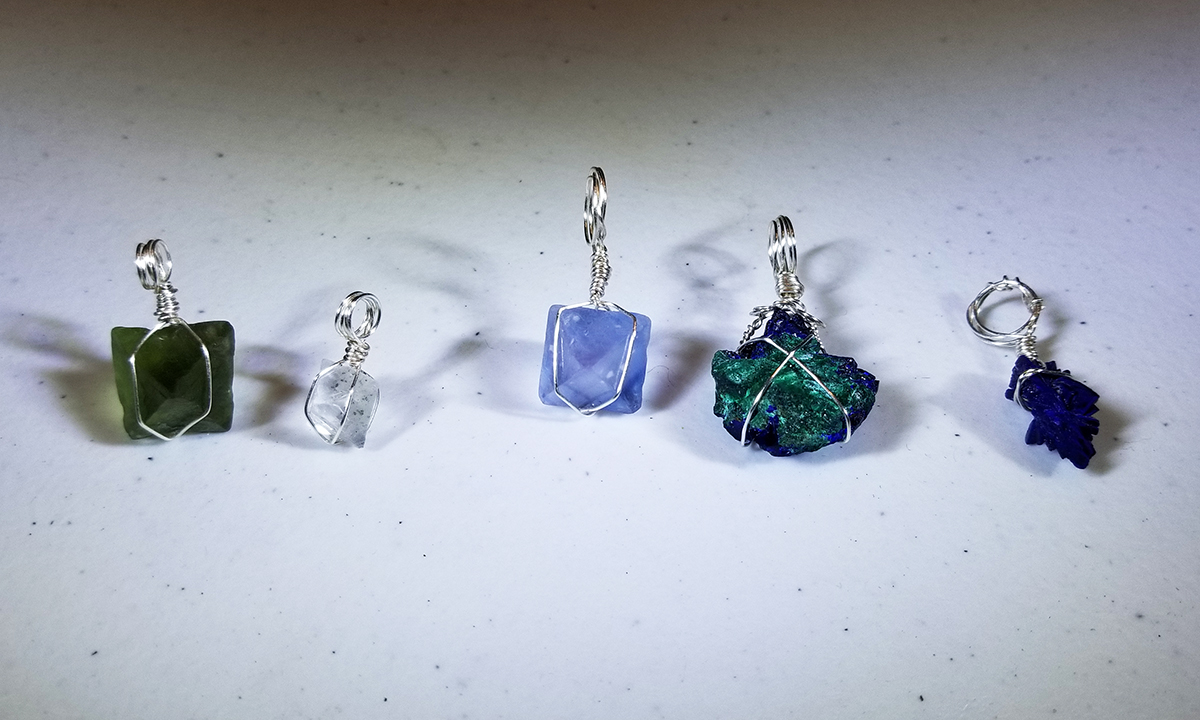
I have been spending a lot of time in New Mexico for work and last fall got an opportunity to visit the Mineral Museum on the campus of New Mexico Tech. The exhibits are really spectacular. But particularly helpful was that they also have a whole case of rocks for purchase. While I’m sure many people purchase these to add to their rock collection I realized that many of the specimens were reasonably priced and sized perfectly for jewelry! I ended up purchasing 5 rocks, all collected in New Mexico, and packed them securely for the ride home.
I mentioned this gift idea to my Mom saying it was for Cherie but not mentioning that I also planned to make one for her. She offered to lend me some wire wrapping jewelry supplies and tools she had that I could use to make the jewelry. The supplies she let me borrow included the following items:
- Jewelry Pliers
- Jump Rings
- 24 gauge jewelry wire
- Made with Love pendants
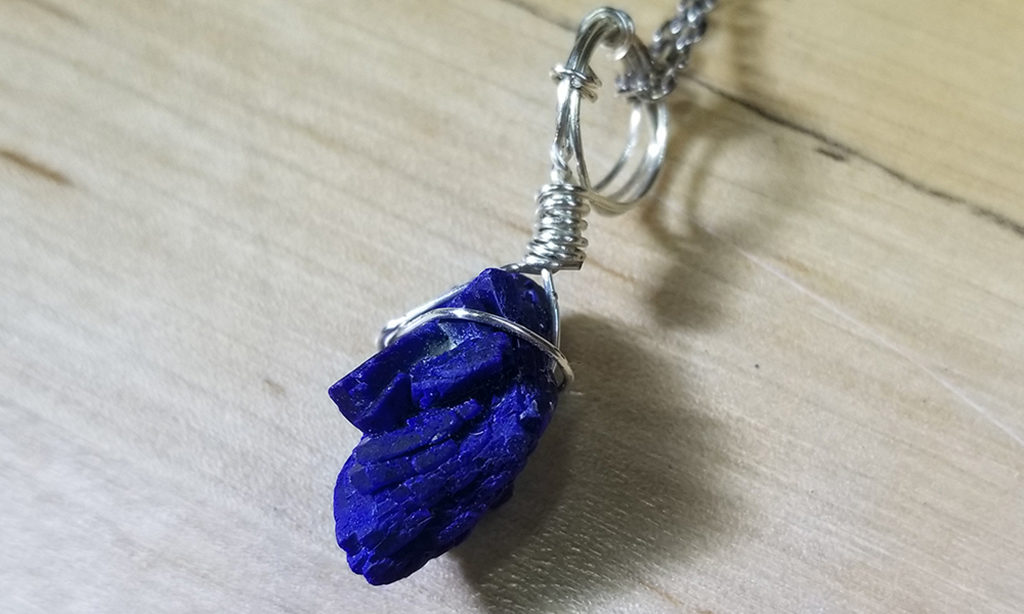
I also purchased necklaces for these pendants to be attached to. After trying a different necklace which was a disappointment I ordered the following one from Honolulu Jewelry. I was super impressed with the quality of the chain and was totally surprised by the quality of the box which included a magnetic lid “latch.” Their boxes were so nice in fact that I ended up not using necklace boxes which I had purchased separately.
Once home, with tools and parts in hand, I needed to learn how to wrap the stones securely so they wouldn’t fall out. I searched online and found several very helpful YouTube videos including the following:
Once I kind of had an idea of the approach it was a matter of just trying my hand at it! I think it’s important to have a rough idea of the shape you want going into it for each stone. I’ll also say that it’s important to look at each stone and decide what features, if any, you can take advantage of to make sure the stone doesn’t come out of the wire wrap. Making sure to appreciate these features and then planning a wrap that will take advantage of these is an important step to making sure they don’t fall out later. Finally be aware of which side of the rock you want to present and select a wrap design that accentuates rather than hides that side.
I started with about 12in of 24 gauge wire for each piece and found that I needed to clip off just a little bit at the end. Start by bending the wire softly in the middle and placing the stone at this point. Then carefully wrap the wire in your planned arraignment. Take time to firmly press the wire so that it holds firmly against the stone. Also make sure to take advantage of twists in the wire where appropriate to give the wire a limited range of motion.
When you get to the top of the stone you’ll need to a plan for creating a mounting point. There are lots of options but I found that I liked the look of just 4 loops of wire. To get nice concentric and consistently sized loops I wrapped them around a #1 phillips screwdriver shaft. Once I had the 4 hoops (2 from each half of the wire) I wrapped the wired around the base of the hoops to give them extra strength and cut them off at that point. I had no issues pulling the screwdriver shaft out at the end.
Note that on one of the stones I chose to do some more ornate wire work around the hoop. This really wasn’t very difficult and I still had plenty of wire to complete this. I’ll also mention that you want to limit how many times you bend the wire back and forth throughout the entire process. While the wire is flexible and easily bent it does get brittle after a few bends. I had one piece of wire break on me after I bent it back and forth at the same spot too many times. Watch out for that or you might find yourself starting over.
Once the pendants were done I mounted each on a necklace. The last step before boxing was to add the “Made with Love” pendant with a jump ring onto the necklace near the clasp. I wish I’d taken more photos of the process or the final outcome, but now they’ve all been delivered!
All 5 necklaces I made seemed to surprise the recipient. They seemed to appreciate the thought that went into selecting stones from New Mexico when I was there as well as learning how to make this neat custom jewelry just so I could make them a gift. It was a fun project and I will not shy away from similar ideas that come to mind in the future!
Disclaimer: I participate in the Amazon Affiliate program. By purchasing items listed on Amazon using the links on this website you are supporting this website. I received no compensation for listing or using any of the products linked to on this page.D